10-Minute Simple Nail Designs That Look Professionally Done
Once, I’d spend hours and dollars at the salon every weekend. But life got too busy, and I started skipping manicures. My nails looked neglected, and I missed feeling confident.
Then, I found a way to make my nails look great at home in under 10 minutes. I’m excited to share my secrets with you.
You don’t need a lot of tools or to be a pro to create stunning nail designs. A simple swipe of polish, a dot, or a line can make your nails stand out. No more worrying about chipped polish or DIY fails.
This guide will show you how to get polished, professional-looking nails easily. Say goodbye to salon trips and hello to quick, beautiful nails at home.
Key Takeaways
- Simple nail designs can rival professional results in minutes.
- Quick nail art doesn’t require expensive tools or hours of practice.
- Salon-quality manicures at home save time and money.
- Beginners can achieve bold looks with basic techniques like dots and lines.
- Confidence comes from easy, repeatable nail design steps.
Why I Started Creating Quick Nail Art at Home
I used to spend over $40 every two weeks on salon manicures. But with busy schedules and fast-fading designs, I sought a better option. That’s when I found the joy of nail art done in my pajamas.
My Journey from Salon Addict to DIY Nail Artist
My early tries were messy, with lopsided dots and uneven edges. But with practice, I got better. Now, I can do trendy nail designs like the “ombre dip” in no time. My biggest discovery? You don’t need fancy tools; just steady hands and patience.
How I Save Time and Money with At-Home Manicures
| Salon Visit | DIY Manicure |
|---|---|
| $35–$50 cost | $5–$10 material cost |
| 90-minute commitment | 20-minute setup |
By switching, I cut my monthly beauty costs by 80%. No more long waits for appointments. I can update my nails anytime, like when OPI’s new diy nail designs line came out last summer.
The Compliments That Keep Me Creating
“Wait, you did that yourself?!”
That’s the best feedback I get now. When I wore gold leaf accents for New Year’s, coworkers thought I’d gone somewhere fancy. My kitchen table is my studio! Positive feedback keeps me inspired, like when I mixed glitter gradients that friends wanted to copy.
Essential Tools for Speedy Nail Designs
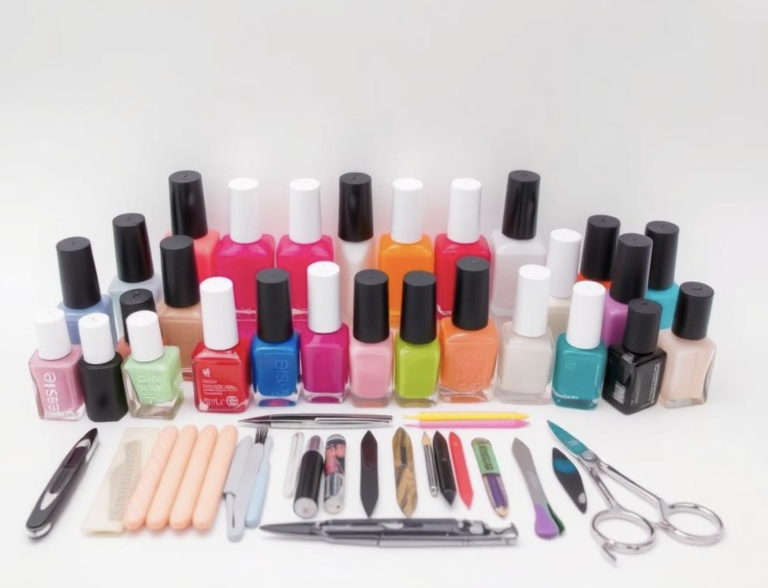
Starting with the right tools makes the nail design process smoother. Let’s break down what you need to create pro-looking results without breaking the bank.
Basic Tools Every Beginner Needs
- Base + top coat: A good base coat like Essie’s “Bonding Base Coat” protects nails. A quick-dry top coat like OPI’s “Fast Dry Top Coat” seals everything in minutes.
- Polishes: Start with 2-3 shades from drugstore brands like Wet n Wild or Sally Hansen for beginner nail art tutorials.
- Dotting tool: A fine-tipped brush like the EcoTools Detail Brush lets you add precise dots or lines.
- Cleanup brush: Use an old toothbrush or a $2 detail brush to fix mistakes instantly.
Affordable Alternatives to Professional Equipment
No need to spend hundreds! Swap a dotting tool with a clean bobby pin bent into a loop. For gradients, use a cotton swab dipped in polish instead of a sponge. Even an old eyeliner brush works for tiny details—just sterilize it first. My go-to picks:
- Walgreens Detailing Brushes ($3)
- Target’s Dotting Tool 5-Piece Set ($5)
My Favorite Polishes for Quick-Drying Results
I rely on polishes that dry fast without smudging. Easy nail art depends on this! Top choices:
- Essie “Rustic Chestnut”: 10-minute dry time, perfect for quick manicures.
- Revlon’s Quick Dry Collection: Affordable and chip-resistant for 3-4 days.
Stick to small brushes (like those in Sally Hansen’s Artistic Effects kit) for precise application. Less is more when time is tight!
Prep in a Flash: Getting Your Nails Ready
Great nail art starts with smooth nails. Here’s a 5-minute routine that works every time. First, push back cuticles with an orangewood stick while in the shower. Soap and water make it easy.
Next, file nails in one direction only with a 100/180 grit file. Filing back and forth weakens nails, so I skip that step.
- Buff nails lightly with a buffer block—just the top surface for shine
- Wipe nails with alcohol pads to remove oils
- Apply a quick-dry base coat in 30 seconds flat
“A base coat is my non-negotiable step—it doubles the longevity of any design.”
Skip the extra steps that waste time. No need for cuticle oil before polish—it can actually repel polish. When I first tried simple nail designs, I learned the hard way that rushed prep leads to chipped edges.
Now, I soak nails in warm water for 30 seconds to soften them before shaping. This cuts filing time by half. Always let each coat cure for 60 seconds before moving on—it’s the secret to no smudging.
My rule? Prep takes longer when you’re stressed. Play music, work by a bright window, and use a timer to stay on track. These steps add 2-3 minutes but save hours of touch-ups later.
Simple Nail Designs That Wow in Minutes
Creating minimalist nail art is easy and quick. You don’t need fancy tools or lots of time. Here are my top picks for fast and beautiful nail designs.
Minimalist Lines and Dots
OPI’s detail brushes are perfect for sharp lines. Here are three easy designs:
- Diagonal Stripes: Paint two lines in opposite directions with black polish over white. I love Essie’s “Ballerina” with a matte top coat.
- Polka Dot Trio: Place three colored dots (pink, yellow, blue) in a triangle. Seche Vite’s quick-dry base coat works great.
Two-Tone Techniques
These designs use just two colors:
- Half-Moon Tips: Paint a thin stripe at the tip with a contrasting color. Try soft pink with gold edges.
- Diagonal Split: Paint the nail in two shades, vertically. Lavender and cream make a cute nail design.
Negative Space Designs
| Design | Materials | Steps |
|---|---|---|
| Geometric Cutouts | Washi tape, two-toned polish | Create triangles with tape before painting |
| Abstract Shapes | Dotting tool, translucent polish | Overlap semi-transparent dots to form organic patterns |
Gradient Effects Without the Sponge
For simple nail designs that look complex, try brushing gradients. Load a flat brush with two colors and drag sideways. My favorite is light purple to white gradients with Essie’s “Lavender Haze”.
The Perfect French Manicure Shortcut
Traditional French tips always left me frustrated—wobbly white lines or smudged edges. Now, my shortcut turns this classic nail design into an easy nail art win in under 10 minutes. No more shaky hands or wasted polish!
Here’s my three-step trick using an angled brush (my go-to is the Essie Slimline Brush 22):
- Paint a thin base coat, then dip the brush halfway into white polish. Wipe the bristles gently against the bottle edge to remove excess.
- Angle the brush at 45 degrees and drag it from the cuticle toward the tip in one smooth stroke. Let the natural bristle shape create the crescent shape.
- Use a makeup sponge to soften edges by tapping—not rubbing—the tip lightly.
I swear by OPI’s “Easy Does It” white polish for opacity. For a modern twist, try a pastel tip or metallic accent. If you slip? Dip a q-tip in remover, hold it 2 inches away, and gently press—not scrub—to lift the mistake. Practice makes perfect, but this method cuts learning time in half. You’ll look salon-ready without the salon cost!
Dotting Tool Magic: Patterns Anyone Can Master
A dotting tool turns tiny drops of polish into big style statements. It’s perfect for cute nail designs. This gadget helps you avoid shaky lines. My favorite is the Wet n Wild Mega Last Precision Liner. It’s under $5 and works like magic.
Polka Dot Variations
- Ombre Gradient: Start with dark dots at the base, fading to light at the tips. Dip the tool in polish, tap once, then lift straight up.
- Confetti Chaos: Mix tiny dots in rainbow colors. Overlap them randomly for a playful diy nail designs vibe.
- Striped Dots: Line up dots vertically for a clean stripe effect. Use two colors for alternating rows.
Tip: Clean the tool between colors with a q-tip dipped in remover. Stiff polish? Add a drop of Essie Fast Dry Top Coat to thin it.
Flower Designs Using Just Dots
| Flower Type | Steps | Colors |
|---|---|---|
| Petals | Arrange dots in a circle, adding a center dot. | Pink + white center |
| Rose | Overlap dots in concentric circles. | Deep red + gold glitter |
| Clover | Three medium dots with a small center dot. | Green + white |
Geometric Patterns for Modern Appeal
- Draw triangles by placing dots in upward-pointing pyramids.
- Create grids by spacing dots evenly in rows and columns.
- Make diamond shapes with four dot clusters at each corner.
These beginner nail art tutorials show even shaky hands can shine. Practice on paper first, then go bold on your nails!
Tape Trick Designs: Crisp Lines Every Time
Turn ordinary tape into your top pick for nail art that looks like it came from the salon. I’ve tried three types: washi, Scotch, and specialty nail tape. My trick? Use thin washi for flexibility and Scotch for straight edges. First, stick the tape to your skin before applying it to your nails. This makes the polish stay in place.
- Geometric Blocks: Place two tape strips at angles, paint between them, then peel slowly for sharp corners.
- Stripes: Overlap tape edges, press firmly, and alternate colors for rainbow bands.
- Chevron Magic: Fold tape diagonally, secure with a dot of top coat, then paint to reveal arrow-shaped designs.
Pro tip: Prep tape pieces ahead for faster application. If polish bleeds, wait 30 seconds before painting—the base coat acts as a barrier. My biggest fix? Let each layer dry 2 minutes under a fan for trendy nail designs without smudges.
- Peel tape at a 45-degree angle to avoid lifting polish.
- Use a toothpick to touch up gaps instantly.
These tricks have saved my at-home nail art game. Even if you’re shaky-handed, you can still get crisp lines—no steady hands needed!
One-Stroke Wonders: Brush Techniques for Beginners
Brushwork doesn’t have to be scary. These tips turned my shaky attempts into beautiful looks, all without fancy tools. Start with these moves to boost your confidence in seconds.
Mastering the Thin Line
To control thin lines, thin your polish with top coat. Mix 1 part polish with 3 parts thinner. Hold your brush like a pencil, at a 45-degree angle. Practice on paper first, drawing straight lines without lifting the brush.
For nails, use short, steady strokes. If your line wobbles, check your brush tip. Dried bristles can cause splay. Try this drill daily; my first perfect line took only three tries!
Simple Swirls and Curves
Fluid swirls come from relaxed wrists. Here’s my 3-step spiral method:
1. Dip your brush in polish
2. Gently drag it in a circular motion from cuticle to tip
3. Lift upward at the end for a tapered finish
These minimalist nail art swirls look great with neutral bases. My favorite is a cream polish base with gold accents. Friends always ask, “Did you use a stamp? Nope, just a steady hand!”
Abstract Art That Looks Complicated (But Isn’t)
Random strokes can create art! Choose two colors like blush pink and matte black. Dip your brush in one shade, then drag it across the nail in erratic lines. Overlap with the second color in diagonal sweeps.
The chaos becomes art—my abstract designs fooled coworkers into thinking I’d spent hours. Pro tip: Let each layer dry 30 seconds between colors for crisp edges.
Seasonal Nail Art That Takes Minutes
I change my trendy nail designs with the seasons. I use simple nail designs that fit each season’s mood. Here’s how I do it fast:
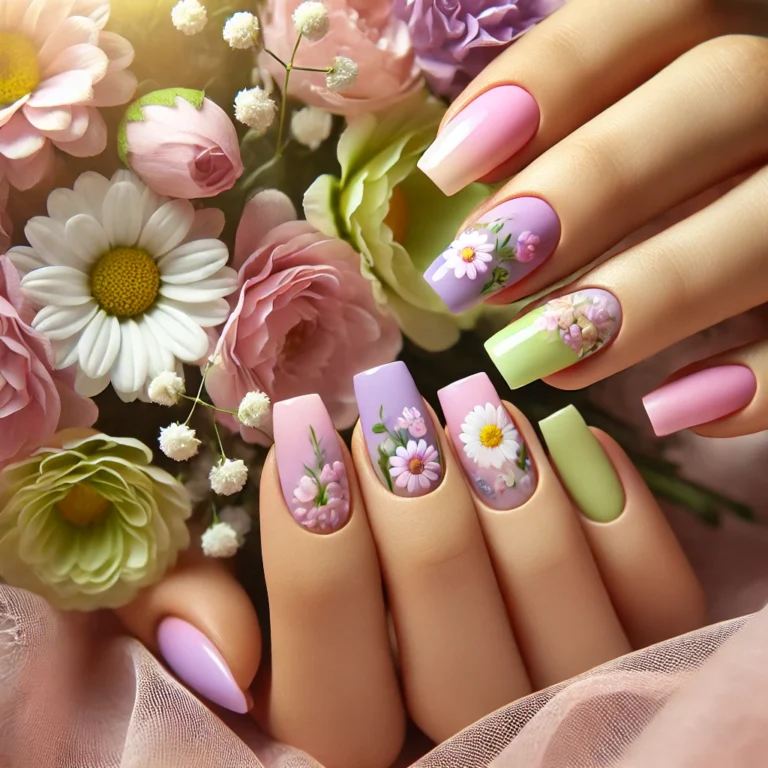
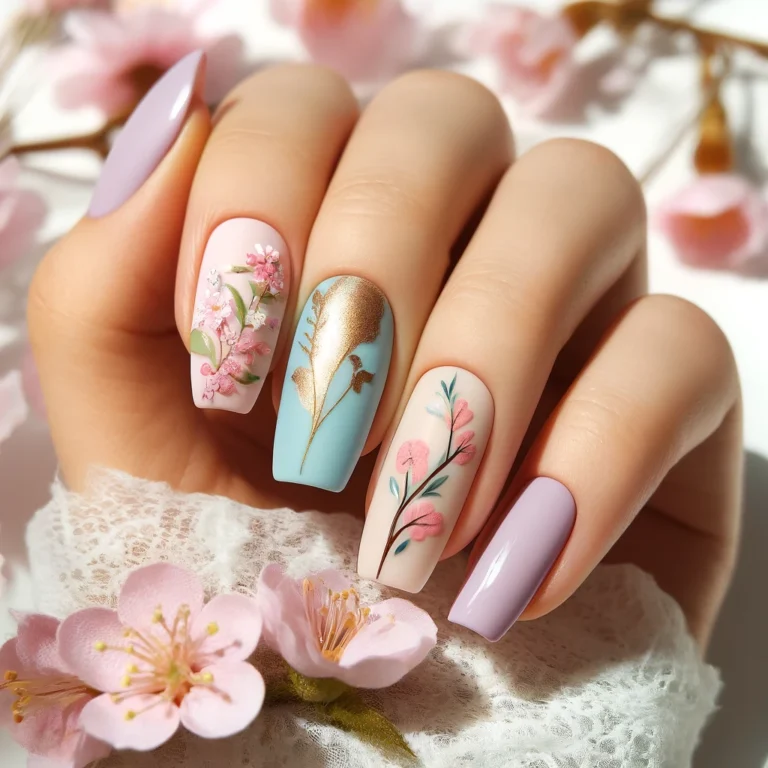
- Spring: I use pastel gradients with OPI’s Celebrate You polish set or tiny floral stickers. It takes just two minutes!
- Summer: For beachy waves, I use Sally Hansen’s Surfer Girl gel polish and a white dotting tool for saltwater splashes.
- Fall: I mix Essie’s Autumn Leaves with matte topcoats for a rustic autumn look. It’s easy and quick.
- Winter: I do festive micro-dots with Zoya’s Spice polish. Adding a single holographic sticker gives it holiday sparkle.
| Season | Design | Tools Needed |
|---|---|---|
| Spring | Pastel gradients + stickers | Base coat, gradient brush |
| Summer | Beach waves | Dotting tool, gel polish |
| Fall | Rustic gradients | Matte topcoat, two polishes |
| Winter | Micro-dot patterns | Dotting tool, glitter |
My secret? Focus on one bold seasonal color and a quick technique. Even my winter snowflake dots only take five minutes. People always ask, “Did you do that yourself?”—and I say yes, with a smile!
My Favorite Nail Design Hacks for Busy Mornings
When mornings are chaotic, my easy nail art shortcuts save the day. These tricks turn rushed routines into polished looks without sacrificing creativity.
Using Household Items for Unique Textures
Household items add texture to nail design in seconds:
| Item | Use | How-To |
|---|---|---|
| Plastic wrap | Marble patterns | Swipe over wet polish, then crinkle and lift. |
| Clean makeup sponge | Stippling effects | Dab sponge lightly on dried polish edges. |
| Produce mesh bags | Scale or lace textures | Press damp mesh onto base coat before adding color. |
Quick-Set Secrets
Speed matters. Here’s how I slash drying time:
- Apply a DIY nail designs base coat, then one quick-dry top coat like Seche Vite.
- Submerge fingertips in ice water for 30 seconds to set polish instantly.
- Drop an oil drop (like coconut oil) on the surface—if it beads, it’s dry!
Mistake Correction Without Starting Over
Oops? No panic. Fix flaws fast with:
- A toothpick dipped in acetone to erase tiny smudges
- Turn mistakes into “intentional” accents—like a smudge as part of a geometric pattern
- Apply a sheer top coat to soften imperfections
These tricks keep me confident even when running late. My go-to? The ice bath method saves 15+ minutes daily.
How to Make Your Quick Manicure Last Longer
Getting nail design results that last a full week takes more than just drying time. I’ve spent years testing tricks to keep simple nail designs intact through work, workouts, and weekend errands. Here’s what works:
- Prep first: Dehydrate nails with rubbing alcohol before polish. This bonds the base coat better than just cleaning with water.
- Base coat layers: Apply two thin coats instead of one thick one. It seals the nail surface perfectly without slowing drying time.
For application, I always use a wrap technique on edges. After painting, gently push the polish toward the cuticle with an orangewood stick. This creates a “lip” that prevents chips at the nail bed.
Top coats are key. I apply two thin layers immediately after polish, then a single maintenance coat every 48 hours. Here’s the schedule that works:
- First 24 hours: Let layers cure fully before handling anything wet.
- Days 2-3: Spot-treat chips with a lint-free swab and touch-up gel pen.
- Day 4: Apply a third top coat focusing on the tips where wear happens first.
My secret for week-long wear? Cuticle oil. I massage it in twice daily but avoid the polish surface. Hot water exposure is a no-go for 24 hours post-application. Even my geometric nail designs last six days using this system—no salon-level tools required!
Nail Art Inspiration: Where I Find My Ideas
I find trendy nail designs everywhere, even in unexpected places! My first stop is social media. I follow nail art creators like @NailArtDaily and @PolishedBySarah for new ideas. Their Pinterest boards, like “Modern Nail Art Trends,” are full of cute nail designs.
- Instagram: @NailTrendHub for seasonal updates
- Pinterest: “Everyday Nail Art Ideas” board
- TikTok: Creators like @QuickNailTips share 5-minute hacks
Runway shows and nature walks also spark my creativity. That floral dress I saw inspired a mini bouquet design. Even my morning coffee mug’s pattern led to a nail art set that got lots of compliments.
“Your mosaic design looks like a tiny work of art!”
I write down ideas in a sketchbook or save photos on my phone. When I see a cute pattern, I take a picture. My “inspo folder” has over 100 ideas waiting to be turned into nails! I adapt trends by simplifying them. That intricate gradient I admired? I made it with two colors and a sponge, saving 30 minutes.
Remember to track what catches your eye. A quick Pinterest search or a note can become your next favorite cute nail designs. Let your surroundings inspire you—the best trendy nail designs come from what speaks to you!
Conclusion: Beautiful Nails Don’t Have to Take All Day
Creating easy nail art is more than a quick fix. It’s a fun way to express yourself without hassle. I’ve found that even simple designs can make a manicure special. Techniques like dotting tools, tape tricks, and gradients show that simple designs can look great.
Starting was hard, but now it brings me joy and saves time. The tools don’t have to be pricey. A good brush, quick-dry polish, and basic tape are enough. I’ve tried many brands and found that mid-priced polishes work well with these methods.
The goal isn’t to be perfect. It’s to have fun while trying new things. Every mistake taught me something, making my designs a creative break from my busy days.
If you doubt your skills, start small. Try one design from this guide today. It could be a two-tone look or a dot pattern. Let your nails show your mood, not your patience level.
Nail art isn’t about being an expert. It’s about trying. Every time I paint my nails, I remember that beauty doesn’t take hours. It just needs a bit of creativity and the right techniques. So, grab your tools, pick a design, and let your nails shine on your terms.
FAQ
What are some of the easiest nail designs I can try as a beginner?
Simple designs like lines, dots, and two-tone colors are great for beginners. They’re quick to do and look great! I have tutorials that show you how to do them.
How can I create trendy nail designs at home without professional tools?
You don’t need fancy tools for trendy nails. A thin brush, dotting tool, and tape can make amazing designs. Even household items like bobby pins and tape can help create sharp lines.
What are some cute nail designs that I can do seasonally?
Seasonal designs are easy and fun. Spring is perfect for simple flowers, while summer is great for beach themes. Fall is for warm colors, and winter is for snowflakes and festive patterns.
How can I make my quick manicures last longer?
To make your manicures last, prep well with a good base coat. Refresh your top coat often and be gentle with your nails. Wearing gloves while cleaning helps too.
Where do you find inspiration for your nail art designs?
Inspiration comes from everywhere! Instagram, Pinterest, nature, and fashion are all sources. I love making trendy designs simple for everyday wear.

2 Comments