DIY Nail Art Mistakes You’re Probably Making (And How to Fix Them!)
Spending hours on a DIY nail art project can be really frustrating. Imagine the disappointment when it chips, smears, or looks uneven. I once tried a glitter design and ended up with a mess everywhere. The glitter spilled and the polish bubbled under the UV light.
I’ve made this mistake many times. But, after years of trying, I’ve found some fixes. It’s not about being perfect. It’s about solving real problems. Let’s turn those mistakes into beautiful nail art.
Key Takeaways
- Skipping prep steps causes 80% of DIY nail art failures.
- Quality tools and base coats make a bigger difference than fancy designs.
- Thin, even layers last longer than thick, rushed applications.
- Patience during drying phases prevents 90% of smudges.
- Proper top coat application is the unsung hero of home manicure tips.
Why Even Nail Art Enthusiasts Make Mistakes
DIY nail art is a journey filled with trial and error. Even seasoned artists stumble because mastering nail art techniques takes time. The nail art learning curve is steep, and tiny nail art details often trip up creators. Nail art patience is key—yet even experts once struggled. Let’s explore why mistakes happen and how to grow from them.
The learning curve of nail art techniques
Complex methods like freehand gradients or 3D gems demand practice. Beginners often rush without mastering basics. For example, applying French tips requires precise brush control. Here’s what I’ve noticed:
- Stenciling: Alignment errors happen without steady hands
- Striping tape: Imperfect placement ruins symmetry
- Gradient mixing: Color ratios take trial to perfect
How small details make a big difference
Minor oversights turn into major flaws. Here’s how details shape results:
| Overlooked Detail | Impact |
|---|---|
| Brush pressure | Light pressure = crisp lines |
| Nail surface prep | Rough edges cause chipping |
The importance of patience in mastering DIY nail art
“Patience is the unsung hero of nail art.”
Slow and steady wins the game. Rushing causes smudges, uneven drying, and rushed designs. My advice: nail art patience builds skill. Take breaks between layers, practice tricky techniques daily, and celebrate small progress. Remember, even professionals spent months mastering their first perfect dot.
Skipping Proper Nail Preparation
When I rushed through nail prep, my manicures always chipped within days. Proper nail preparation steps are essential for lasting designs. Clean nails for polish ensure adhesion, while nail dehydration prevents bubbles. Skipping even one step leads to disappointment.
“Poor prep is the #1 reason for polish failure,” says a top nail tech. “It’s non-negotiable.”
- Clean nails for polish: Use acetone wipes to remove oils and old polish.
- Dehydrate nails: Buff lightly with a 180-grit block to create texture for polish grip.
- Shape edges: File nails into a square or round shape for even polish distribution.
- Cuticle care: Push back cuticles gently to avoid lifting later.
Skipping nail dehydration leaves oils that repel polish, causing peeling. I learned this the hard way after three weeks of redoing my tips. For best results, follow this routine every time—even if it takes extra minutes. Troubleshoot issues like bubbling by ensuring full dehydration. Your tools matter too: invest in quality buffers and acetone wipes for visible results.
| Step | Why It Matters |
|---|---|
| Cleaning | Removes debris for strong polish adhesion |
| Dehydration | Ensures polish bonds to the nail bed |
| Shaping | Creates a smooth canvas for designs |
| Cuticle care | Prevents polish from lifting at the edges |
My manicures lasted twice as long after I prioritized these steps. Don’t cut corners—your nails (and future you) will thank you.
Using Low-Quality Base Coats
Protecting your nails starts with the right base coat. A quality base coat acts as a shield between your nails and polish. Many skip this step or use cheap alternatives. This choice costs you time and money in the long run.
How Base Coat Quality Affects Longevity
Chemistry matters. Look for formulas with formaldehyde resins to strengthen nails. Also, UV protectants prevent yellowing. Avoid products filled with fillers—they create uneven surfaces that make polish peel faster. My tests show professional base coats last 3x longer than drugstore options.
- Key ingredients: quality base coats contain nylon or calcium to smooth nails
- Red flags: Thick texture or artificial fragrance signals low-quality
My Favorite Professional-Grade Base Coats
I’ve tested dozens and stand by these picks:
- OPI Stay Flexible Base Coat – Flexible formula reduces ridges
- Essie Base Coat – Adds 48-hour nail polish longevity with vitamin E
- Sally Hansen Hard As Nails – Affordable best nail base coats for weak nails
Signs Your Base Coat Isn’t Working
Notice these red flags within 48 hours:
- Polish starts peeling at edges
- Yellow stains appear under color
- Top coat pools instead of smoothing
Upgrading to a professional base coat isn’t just a splurge—it’s insurance for your entire manicure. Prioritize ingredients over price, and watch your designs last longer than ever.
The Curse of Thick Polish Layers
Thick polish might seem quicker, but it leads to bubbly, uneven manicures. Even seasoned artists struggle with this mistake. Let me show you how to avoid it.
Why thin layers are better
Science proves thin nail polish layers dry faster and stick better. Thick coats trap air, causing peeling. My tests show three thin coats last twice as long as one thick coat. Remember, patience beats speed here.
Techniques for even application
- Brush loading: Dip your brush halfway into polish for controlled distribution
- Three-stroke method: Swipe once center, then one on each side for even coverage
- Wrist angle: Keep your hand at 45° to avoid dripping
“The best nail art starts with a whisper-thin foundation.” – Nail Tech Collective
How to fix thick polish
If your brush overloaded, act fast. Use a lint-free cloth to gently wipe excess before drying. For hardened globs, apply a thin coat of topcoat to seal, then rebuild with proper nail polish application techniques. Always let each layer cure fully between coats.
Forget “one-coat wonders”—they’re marketing myths. Real longevity comes from mastering thin, even layers. Your nails will thank you.
Rushing the Drying Process
Creating DIY nail art requires patience. Trying to speed up nail polish drying time can lead to smudged nail polish. This ruins all your hard work. The polish hardens as solvents evaporate, a process that can’t be rushed.
My approach begins with letting base coats dry fully. Here’s what I do:
- Apply thin coats as directed in earlier sections.
- Let each layer cure undisturbed for 2-3 minutes.
- Avoid touching or buffing until fully dry, not just touch-dry.
| Method | Effectiveness | Drawbacks |
|---|---|---|
| Cold water rinse | Accelerates surface drying | Risk of softening polish |
| Drying drops (e.g., Essie Dri-Eaz) | Reduces drying time by 50% | Requires precise application |
| Quick-dry top coat (e.g., Seche Vite) | Forms a protective seal instantly | Adds extra layer thickness |
To check if nails are dry, press tissue paper gently against them. If it sticks, they need more time. I’ve learned that using quick-dry top coat and being patient is key. Rushing nail polish drying time isn’t worth the risk of a smudged design.
Common DIY Nail Art Tool Mistakes
Choosing the right nail art tools is like picking the right pen for an artist’s sketchbook. Many beginners make mistakes here, leading to frustrating results. I’ve seen many DIYers use flimsy brushes that bend or snap mid-design. Quality equipment can solve these problems.
Essential tools you shouldn’t skimp on
Invest in nail art brushes with stiff bristles, like Sigma or EcoTools, for precise lines and shapes. Cheap synthetic brushes fray easily, ruining designs. Don’t underestimate dotting tools either; a good glass or plastic handle offers control, unlike flimsy plastic ones that slip.
How to properly clean and maintain your tools
Proper nail art maintenance starts with cleaning tools immediately after use. Use mild soap and water, then reshape brush bristles while damp. Store brushes upright to prevent deformation. For dotting tools, wipe tips with alcohol to remove residue. Neglecting this leads to stiff brushes and clogged tools—trust me, I’ve had to replace too many ruined ones.
Budget-friendly alternatives that actually work
Stretch your budget by repurposing household items: a toothpick makes a surprisingly good dotting tool, and a makeup sponge can buff edges. But don’t skimp on nail art brushes—they’re worth the splurge. My go-to? A $10 flat-top brush beats a $5 one every time.
Ignoring Your Nail Shape and Size
Your nails aren’t just for random art—nail shapes are key. Many DIYers forget how their natural nail shape or length impacts designs. I learned this the hard way. A design perfect for oval nails might look too tight on square ones.
First, figure out your nail shapes (square, round, almond, coffin, or oval). Then, pick nail designs by shape that make your hands look better.
- Square nails: Bold stripes or geometric patterns
- Round nails: Soft gradients or dot accents
- Almond/ coffin: Detailed tips like gradients or rhinestones
- Oval/ short nails: Mini patterns like polka dots or tiny florals
Short nails can have more than just basic colors. Nail art for short nails can be mini versions of big trends. I’ve made abstract art fit my nails by shrinking motifs. Instead of big patterns, try borders or tip details.
My favorite? A personalized nail art with small glitter accents on my short nails. They add a touch of sparkle without taking up too much space.
“When I first tried a trending floral design meant for long nails, it looked cluttered. Redrawing the flowers smaller and focusing on two fingers made all the difference.”
Choosing nail designs by shape that match your nails is more than just looks—it’s practical. The right design lasts longer and feels balanced. Start by trying out shapes that fit your hands. Your nails’ unique shape is your creative base.
Color Combinations That Clash (And Ones That Don’t)
Mastering nail polish color combinations is key to avoiding a chaotic look. Nail art color theory teaches how hues interact. Start with basics like warm (reds, oranges) and cool (blues, purples) tones. Then, explore complementary nail colors opposite the color wheel.
Understanding color theory for nail art
Begin by pairing analogous colors—neutrals like beige and taupe blend effortlessly. For contrast, try nail polish pairing of red and green, or blue and orange. Avoid mixing matte and glossy finishes—they compete for attention. My top tip? Test swatches on your skin first to see how they interact with your undertones.
Foolproof color combinations for beginners
- Neutral Base + Accent Dot: Use a white base with black or gold dots for a timeless look.
- Seasonal Palettes: Autumn tones love burnt orange + gold; spring prefers pastels like lavender and mint.
- Monochromatic Magic: Vary shades of a single color (e.g., light pink to deep burgundy) for depth without chaos.
How to test colors before committing
Paint small swatches on your nails 24 hours before your final design. Check under different lighting—office fluorescent vs. natural sunlight—to ensure harmony. Here’s a quick guide:
| Season | Colors |
|---|---|
| Spring | Pastels (peach, blush, mint) |
| Summer | Brights (coral, fuchsia, gold) |
| Autumn | Earthy tones (rust, olive, terracotta) |
| Winter | Neutrals (charcoal, silver, ivory) |
“Pairing two bright neons? Tone it down with a matte finish on one color.” – Pro Tip
Freehand Designs: Expectations vs. Reality
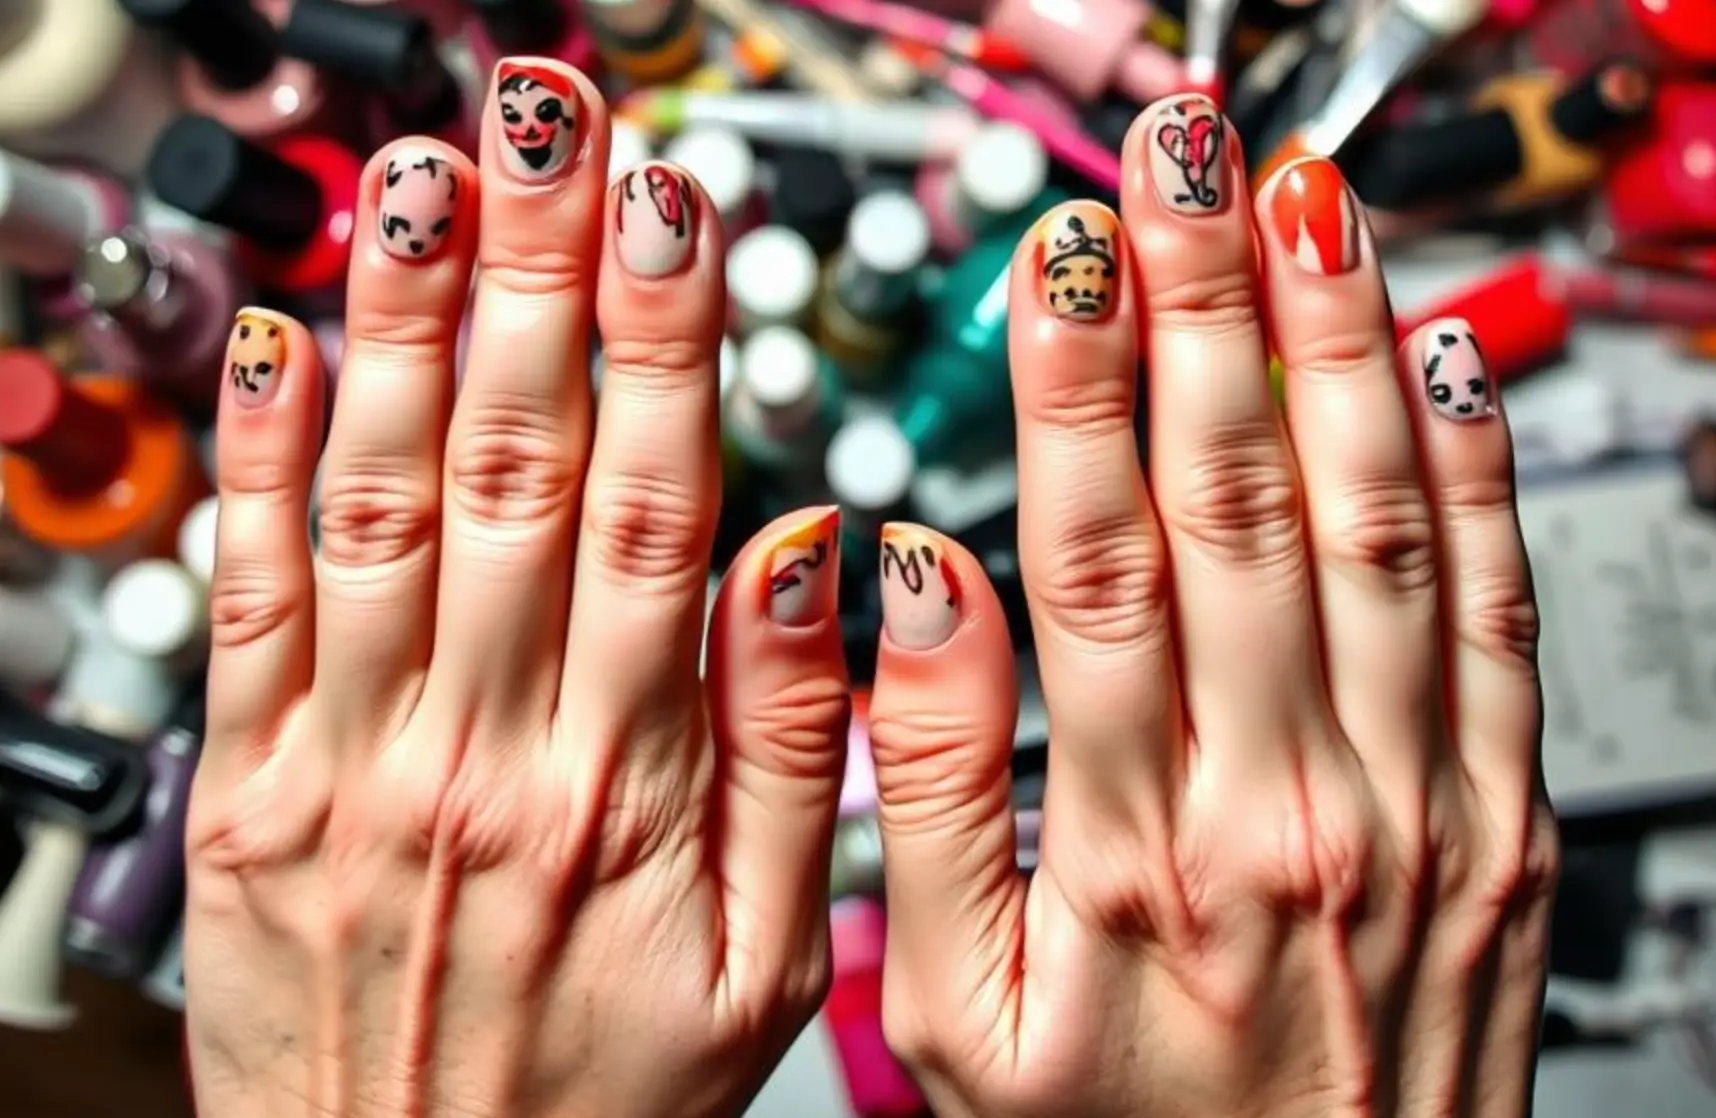
Starting with freehand nail art can feel overwhelming. Your early tries might look nothing like the polished designs you see online. I remember looking at my first beginner nail designs and wondering why they didn’t match what I saw on Instagram. The truth is, realistic nail expectations are key. Progress comes with time, not just talent.
My first try at a rose looked more like a tulip… with three stems. Now I sketch petals confidently. The shift came from practicing basics daily.
Work on nail art practice techniques to improve your skills:
- Outline shapes on paper before nails
- Use dotting tools to train precision
- Watch slow-motion tutorials for stroke patterns
Remember, freehand nail art takes time to master. Don’t get discouraged if it doesn’t look perfect right away. Celebrate small victories, like getting a straight line or a clean edge. Take photos of your progress every week. Let your mistakes remind you that even pros started where you are now. It’s not about avoiding mistakes, but learning from them.
DIY Nail Art Trends That Are Harder Than They Look
When you scroll through Instagram, you see nail art trends like 3D roses or gradient ombres. They might seem simple, but they require advanced skills. I’ve spent weeks mastering these looks and learned the difficult nail art techniques behind them. Let’s explore what’s needed and how to make them easier for you.
Instagram-Famous Techniques Decoded
Techniques like 3D nail art or holographic overlays need precise brushwork and special tools. For instance, creating seamless gradients requires a steady hand. Most tutorials don’t show the hours of practice needed to master these steps. The real challenge is in the execution, not just the idea.
Simplified Nail Designs for Your Skill Level
Instead of freehand 3D flowers, try using stamping kits from Essie or Born Pretty. Use gradient strips for gradients instead of painting them by hand. These simplified nail designs capture the trend’s essence without needing advanced skills. Start with fake nails before moving to real ones.
Practice Exercises for Skill Growth
- Trace patterns on paper to improve hand control.
- Use dotting tools to create polka dots before attempting freehand lines.
- Test gradients on sticky notes to master color blending.
Building these nail art skill building habits makes tricky trends achievable. Focus on progress, not perfection. Every practice step is important.
The Forgotten Step: Proper Top Coat Application
Proper nail top coat application is key for lasting manicures. Yet, it’s often skipped or rushed. This leads to designs chipping in days. My method begins with a thin first layer to avoid pooling. Wait for it to dry fully before adding a second coat.
- Hold the brush parallel to nails to prevent dragging polish into designs.
- Focus on sealing nail tips—dab the brush tip gently over the free edge to protect the weakest point.
- Choose a long-lasting top coat like a gel-like formula for intricate designs.
When using a quick-dry top coat, shake it well first to activate drying agents. For 3D or glitter designs, a matte top coat creates a protective barrier without smudging. Avoid applying too thick—it’s better to layer two thin coats than one sloppy one. Bubbles? They form from overlapping coats. Tap the surface lightly with a buffer block to pop air pockets before curing.
- Shrinkage Fix: Swirl a tiny drop of top coat onto dried edges.
- Yellowing Prevention: Use clear, non-yellowing formulas like Essie’s “Top It Off”.
My routine: Apply one long-lasting top coat, wait 5 minutes, then add a second layer. This extends wear by 48 hours compared to single-layer applications. Don’t let this step be your weakest link—mastering it turns good manicures into great ones.
Why Your Nail Art Chips So Quickly
Ever wondered why some manicures last days while others crack in hours? Hidden factors like household chemicals or daily routines could sabotage even flawless applications. Let’s break down the real reasons and solutions to boost nail polish durability.
Hidden causes of premature chipping
- Harsh soaps: Antibacterial gels or dish detergents weaken polish bonds. Wear gloves during chores.
- Nail plate texture: Rough nails absorb polish unevenly. Use a fine buffer before applying base coats.
- Humidity: Moisture trapped under polish expands, causing bubbles and peeling. Always dry nails thoroughly.
My foolproof sealing technique
- Apply a thin top coat layer, cure under LED light (30 seconds for gel-like finishes).
- Wait 5 minutes. Add a second layer, focusing on edges where chipping starts.
- Seal with a fast-dry top coat like Essie Dot Clear Top Coat for extra long-lasting nail art.
Daily habits that destroy nail care habits
| Bad Habit | Fix |
|---|---|
| Scratching cuticles | Use a wooden orange stick to gently push back cuticles |
| Hot showers | Keep water under 100°F; apply a protective base coat like OPI Nail Envy first |
“The right products and small adjustments can double your manicure’s lifespan.”
Troubleshooting Smudges and Smears
Even the best nail artists get smudges sometimes. My fixing smudged nails kit has quick fixes for small smears and nail art repair tips to rescue a manicure. First, check how bad the smudge is: small ones can be fixed, but big dents might need a redo.
- For fresh smears, use a toothpick dipped in nail polish remover to gently lift the stain.
- Apply a tiny dot of polish to fill in chips, then drag a wooden stick sideways to blend.
- Seal repairs with a top coat layer to prevent further damage.
| Issue | Fix | Restart Needed? |
|---|---|---|
| Light smudge | Spot touch-up with matching polish | No |
| Deep dent | Buff surface with a 1000 grit buffer | Only if base coat is damaged |
| Complete smear | Paint over with a gradient overlay | No if design allows |
My polish touch-up techniques include the “spot rescue” method: dab a Q-tip in acetone, tap—not rub—the affected area, then rebuild the design. For corner chips, apply a French tip shape over the damaged edge. Remember, save ruined manicure efforts work best when damage is less than 30% of the nail plate. Always work in a well-lit area to spot issues early.
Taking Your DIY Nail Art to the Next Level
Once you’ve learned the basics, making small changes can make a big difference. These steps will help you improve your nail art. They turn good designs into amazing pieces.
Simple techniques with professional results
Even beginners can do advanced nail art techniques with a bit of focus. Try gradient sponging for smooth fades or reverse stamping for detailed patterns. Adding glitter in corners adds drama without being too hard.
These methods need practice, but they’re worth it.
Equipment upgrades worth the investment
Getting better nail art equipment can really help. Get a precision brush set from Sigma Beauty for small details. A UV/LED curing lamp dries polish faster.
Light-curing systems like the Essie LED Lamp keep polish looking good longer. Start with tools that fix your biggest problems, then add more as you go.
How to photograph your nail art like a pro
Getting the perfect shot takes some effort. Use natural light or a ring light for even lighting. Hold your hands at a 45-degree angle to show off the nails.
Edit your photos with apps like Facetune to fix colors and contrast. Keeping your lighting and angles consistent makes your nail art look great on social media.
- Lighting: Avoid harsh shadows with diffusers.
- Angles: Shoot from above for full views or side angles to show layers.
- Editing: Use presets in VSCO or Snapseed for professional touches.
Small changes in techniques, tools, and how you show your work can make a big difference. These changes turn simple projects into stunning, professional nail art that gets lots of likes online.
Conclusion
Every nail art journey begins with small steps. Even experienced artists keep improving every day. Don’t let mistakes stop you. View them as lessons that make your designs special.
When I started, sharing my work online gave me the courage to keep trying. Feedback from others helped me grow. I suggest you find similar support too.
Keep track of your nail art practice in a sketchbook or app. Note which polishes last longest or which techniques are easiest. This habit boosted my nail art confidence by reminding me of past successes.
Remember, progress isn’t always straight. Some days your designs will shine; others might need touch-ups. Both are important.
See each manicure as a form of self-care. It’s not about being perfect—it’s about enjoying the process. When you share your work, focus on how it makes you feel, not just how it looks.
Stay curious. Follow tutorials, try new brushes, and retry failed ideas. Over time, your skills will grow naturally. Celebrate small victories and don’t be afraid to ask for help. Your nails are your canvas—keep creating, learning, and enjoying the journey.
FAQ
What are the most common mistakes in DIY nail art?
Common mistakes include not preparing nails well and using bad base coats. Also, applying too much polish and not letting it dry properly. These mistakes can ruin your manicure. I’ve learned to avoid these to get better results.
Why is nail preparation so important?
Nail prep is key for a great manicure. It means cleaning, shaping, and moisturizing your nails. Skipping this can cause polish to lift or bubble. So, I always spend time on this step.
How can I apply nail polish in thin layers?
To get a smooth finish, use thin layers of polish. I load the brush right and use the three-stroke method. This makes drying faster and your polish last longer.
What should I use for a top coat, and why?
A good top coat seals and protects your nail art. I choose based on the finish I want. Quick-dry for speed, gel-effect for shine, and matte for a sleek look. Remember to “wrap the tip” for longer wear.
How can I identify if my base coat is ineffective?
If your base coat is bad, you might see chipping, staining, or poor adhesion. If you see these, it’s time to try a better one.
How can I prevent my nail art from chipping?
To stop chipping, seal your design with a thin top coat. Also, protect your nails daily, like wearing gloves when cleaning. This helps a lot.
What tools do I need for DIY nail art?
You’ll need good brushes, dotting tools, and nail tape. Quality tools are crucial for detailed designs. Clean and maintain them well to make them last longer.
Can I create nail art designs that fit my nail shape?
Yes! Choose designs that match your nail shape. Some look better on longer nails, while others work for shorter ones. I adjust designs to fit my nails for the best look.
How do I test color combinations before committing to a full design?
Test colors on a swatch first. This shows how they look together and if they match. It saves you from bad combinations later.
What should I do if my manicure smudges or smears?
You can fix small smudges with a small brush and polish remover. But, if it’s bad, you might need to start over.

3 Comments